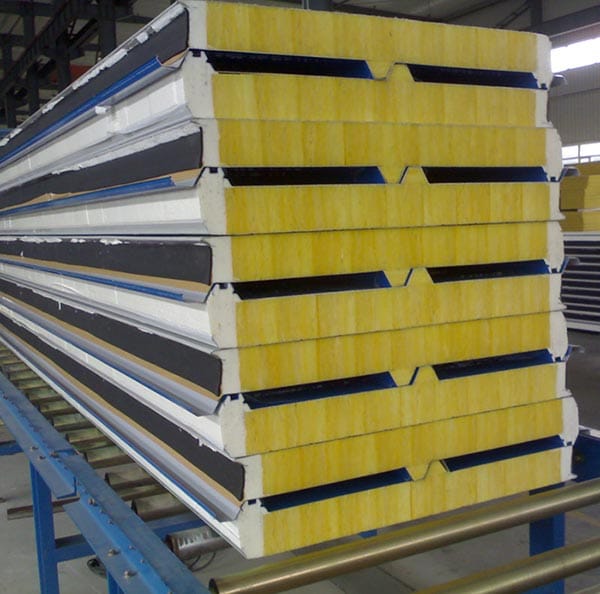
PU edge banding rock wool roof panel installation
Installing PU edge banding rock wool roof panel involves careful planning and execution to ensure optimal performance in terms of insulation, durability, and safety. Below is a comprehensive guide outlining the key steps for installing these panels effectively.
Materials and Tools Needed
Materials:
- PU edge banding rock wool roof panels
- Fasteners (screws, bolts, or clips as specified)
- Sealants (compatible with PU and rock wool)
- Insulation tape (if required for sealing)
Tools:
- Measuring tape
- Level
- Drill
- Screwdriver
- Utility knife (for cutting panels if necessary)
- Safety gear (gloves, goggles, hard hat)

Step-by-Step Installation Process
Site Preparation:
Assess the Structure: Ensure that the roof structure is sound and capable of supporting the weight of the panels.
Clean the Area: Remove any debris, dust, or obstacles from the installation area to ensure a smooth working environment.
Measurement and Planning:
Measure the Roof Area: Accurately measure the dimensions of the roof to determine the number of panels required.
Plan the Layout: Plan the layout of the panels, typically starting from one edge and working across to ensure proper alignment and fit.
Preparing the Panels:
Inspect Panels: Check each panel for damage or defects before installation.
Cut Panels (if necessary): If panels need to be cut to size, use a utility knife or saw. Ensure smooth edges for better sealing.
Installing the Panels:
Position the First Panel: Start at the lowest point of the roof (typically near the eaves). Position the first panel securely against the roof structure.
Secure the Panel: Use the specified fasteners to attach the panel to the roof structure. Ensure that screws or bolts are driven in straight and are secure but not over-tightened.
Sealing Joints:
Apply Sealant: After securing the first panel, apply a compatible sealant to the joints where the panels meet. This helps prevent air and moisture infiltration.
Overlap Panels: If using multiple panels, position the next panel so that it overlaps the first panel’s edge, ensuring a tight seal.
Continuing Installation:
Repeat the Process: Continue placing and securing additional panels according to the planned layout. Ensure that each panel is level and aligned with adjacent panels.
Check Alignment: Use a level to check that panels are installed correctly and adjust as needed before securing.
Final Sealing:
Seal All Joints: Once all panels are installed, perform a final inspection and seal any remaining joints or seams with additional sealant or insulation tape.
Finishing Touches:
Inspect the Installation: Conduct a thorough inspection to ensure all panels are securely fastened, joints are sealed, and the installation meets the required specifications.
Clean Up: Remove any debris and tools from the installation site, ensuring a clean and safe environment.
Safety Considerations
Personal Protective Equipment (PPE): Always wear appropriate safety gear, including gloves, goggles, and a hard hat, during installation.
Fall Protection: If working at heights, ensure fall protection measures are in place.
Proper Handling: Be cautious while handling panels to avoid damage and ensure your safety.
Conclusion
Installing PU edge banding rock wool roof panel requires careful attention to detail and adherence to safety protocols. By following this guide, you can ensure a successful installation that maximizes the panels’ thermal insulation properties and overall durability. Proper installation will contribute to energy efficiency and comfort in the building, effectively protecting it from environmental elements.
